Basic coding in picture sources
This topic will get you started with coding picture sources—refer to More manual coding techniques for more detailed information.
What do you want to do?
- Understand what you can code in a picture source
- Code at a node
- See what you have coded
- Understand shadow coding
- Turn on or off shadow coding
- Open a node to see the picture references
Understand what you can code in a picture source
In picture sources you can code:
-
A region of the picture
-
Text in the Content column of the picture log (if you have one)
-
The entire picture source

Code at a node
-
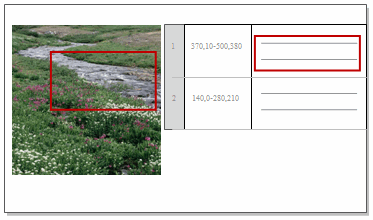
Click and drag to select the region of the picture that you want to code. You can also code text in the Content column of the picture log.
-
On the Analyze tab, in the Coding group, under Code Selection At, click New Node.

The New Node dialog box is displayed.
-
(Optional) To choose where you want to store the node—in the Location box, click the Select button and select the location.
-
Enter a name for the node.
-
(Optional) Enter a description of the node.
-
Click OK.
NOTE
-
To indicate that coding is successful, a confirmation message is briefly displayed in the NVivo status bar.
-
If you want to code at a node that already exists, click Existing Nodes, under Code Selection At, and select the relevant node.
-
Refer to More manual coding techniques for more detailed information about coding.
See what you have coded
To see what has been coded in your picture source
-
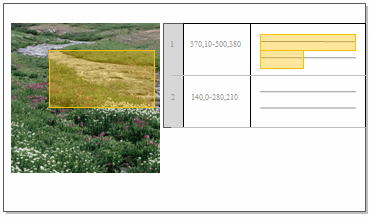
Turn on coding highlight—on the View tab in the Coding group, click Highlight, and then select a highlight option. The coded region of the picture is shaded in yellow:

-
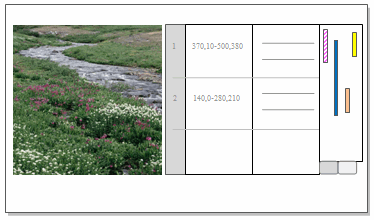
Turn on coding stripes—on the View tab in the Coding group, click Coding Stripes, and then select a stripe option. Coding stripes are displayed in a panel on the right, click the Image tab at the bottom of the panel to see stripes for the image, click the Log tab to see stripes for the log:

For more information, refer to Highlight coding references and Use coding stripes to explore coding.
Understand shadow coding
When you code a portion of the picture, the associated log text is also indirectly coded, this is called 'shadow coding'. Similarly if you code a log with region coordinates, the associated region of the picture is shadow coded. This is a quick way of determining which part of the picture the coded log refers to and vice-versa.
Shadow coding saves you from having to code both the picture and associated log content. For example, if you coded the log entry, you do not have to code the associated picture region—when you open the node, you can see the picture that has been shadow coded.
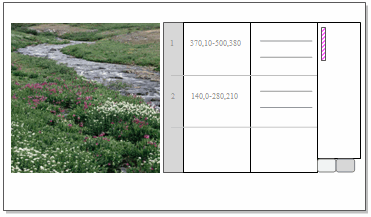
You can distinguish the shadow coding stripes from the normal coding stripes by its pattern. The example below indicates that the main coding was done on the log and the picture is shadow coded:

You can use the tabs under the coding stripes panel to view the coding stripes for Image or Log.
NOTE If you coded the picture directly, the log entry will still be shadow coded but it will not be shown in the node.
Turn on or off shadow coding
When you are reviewing the coding stripes for a picture source, you can turn the shadow coding on or off.
-
On the View tab, in the Coding group, click Coding Stripes, and then click Shadow Coding.

Shadow coding in the open source is turned on/off.
NOTE By default, shadow coding is always turned on when you first open a picture source and display coding stripes.
Open a node to see the picture references
-
Select the node in List View.
-
On the Home tab, in the Item group, click Open, and then click Open Node.

The node opens in Detail View.
-
Click on the Picture tab.
NOTE You can also open nodes from the main coding stripes or the shadow coding stripes—right-click on the coding stripes to display the shortcut menu, and then click Open Node.


