


About Report Designer
You can use Report Designer to:
-
Modify reports that you have created using the Wizard
-
Modify the predefined reports that come with NVivo
-
Manually create and design your own reports
In this topic
- Understand the Report Designer workspace
- Understand controls
- Understand how edit mode works for reports
- Layouts for non-grouped reports
- Layouts for grouped reports
Understand the Report Designer workspace
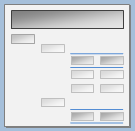
When you create or modify a report using the Report Designer, a workspace displays in Detail View. The left side of the screen shows the structure of the report divided into a number of bands.
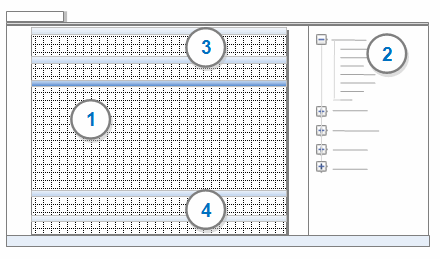
1 Detail band is the main part of the report where all of the records to be included in the report are printed.
2 Field List includes all the fields that can be added to the report. The available fields depend on the view that the report is based on.
3 This area includes the Page Header and Report Header bands.
-
The page header is printed at the top of every page—for example, it can display the date and time the report results were generated.
-
The report header is printed at the beginning of the report—for example, it can display the report title. You could also add an image—for example, a logo.
4 This area includes the Page Footer and Report Footer bands:
-
The page footer is printed at the bottom of every page—for example, it can display the page number and total number of pages.
-
The report footer is printed at the end of the report. This could include report totals or other summary information.
NOTE Depending on the layout you have selected—or if your report includes grouping—you may see additional bands.

Understand controls
Controls are rectangular objects on the Report Designer workspace that represent the information that will be displayed in the report when it is run.
When you add a field to the report, NVivo adds two controls—one for the field and one for its label. The placement of the controls depends on the layout of the report—for example, with Columnar layout (shown below), the label controls are placed to the left of the field controls.
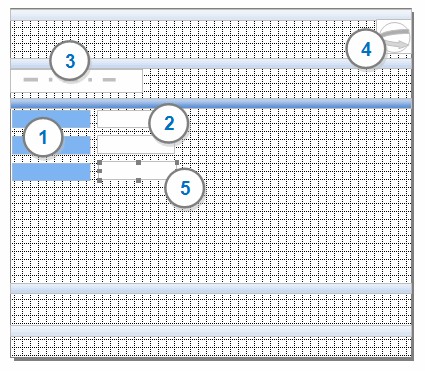
1 Label controls are associated with each field. They are added automatically when you add a field to the report design. You can change the label to make it more meaningful—for example, you can change Name to Node Name.
2 Field controls represent the data that is included in the report.
3 You can add text controls to display your own text on the report. You can also add header or footer controls to display information such as report title or date.
4 You can add image controls to display graphics—for example, you can add a logo.
5 Handles are displayed when a control is selected. You can move or resize a control.
Understand how edit mode works for reports
When you open a report in the Report Designer, it opens in edit mode and you can make changes to the report if you want to.
If you are working in a server project and your report opens read-only, this means that someone else has the report open in edit mode. When the report is read-only, you cannot scroll up and down or make changes to the report. When the other person has closed the report (or switched to read-only mode) you will be able to switch to edit mode.
Layouts for non-grouped reports
If you have not specified grouping for your report, you can choose from two different layouts.
NOTE Manually applied text formatting—for example, changes to the fonts or font color—are lost if you change to a different layout.
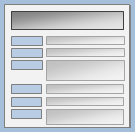
Columnar layout
The Columnar layout displays the fields vertically on the page.
Example of Columnar layout
| Folder Name | Internals | |
| Item Name | My Article | |
| Item Type | Document | |
| Folder Name | Internals | |
| Item Name | My Interview | |
| Item Type | Audio | |
| Folder Name | Externals | |
| Item Name | My Book | |
| Item Type | Externals |
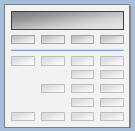
Tabular layout
The Tabular layout displays the fields horizontally on the page.

Example of Tabular layout
| Folder Name | Item name | Item Type |
| Internals | My Article | Document |
| Internals | My Interview | Audio |
| Externals | My Book | External |
Layouts for grouped reports
If you have specified grouping for your report, you can choose from three different layouts.
NOTE Manually applied text formatting—for example, changes to the fonts or font color—are lost if you change to a different layout.
Stepped layout

Example of Stepped layout
| Folder Name | Item Name | Item Type |
| Internals | ||
| My Article | Document | |
| My Interview | Audio | |
| Externals | ||
| My Book | External |
Block layout
Example of Block layout
| Folder Name | Item Name | Item Type |
| Internals | My Article | Document |
| My Interview | Audio | |
| Externals | My Book | External |
Outline layout
Example of Outline layout
| Internals | ||
| Item Name | Item Type | |
| My Article | Document | |
| My Interview | Audio | |
| Externals | ||
| Item Name | Item Type | |
| My Book | External |