


More manual coding techniques
NVivo provides a number of ways to manually code your sources. You can define your node structure first and then code at the existing nodes or you can create and code at nodes as you work through your source material.
What do you want to do?
- Code at an existing node
- Drag and drop coding
- Code at a new node
- Using the Quick Coding bar
- Using nicknames to speed up coding
- Code entire sources to a node
- Make a node from selected text (In Vivo code)
- Turn on or off code whole words
Code at an existing node
-
Select the content you want to code.
-
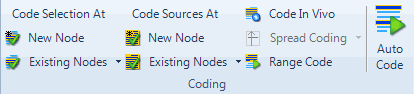
On the Analyze tab, in the Coding group, under Code Selection At, click Existing Nodes.
The Select Project Items dialog box opens.
- On the left, click the folder name that contains the node you want to code at.
- On the right, select the check box for the node you want to code at.
- Click OK.
NOTE
-
You can code the selected content at multiple nodes.
-
If the node you want to code at has a nickname, you can select it from the Select item from nickname list and click Select.
-
To filter the nodes available for selection in the Select Project Items dialog box, click the Filter button and define the filter criteria—refer to Find project items for more information.
-
To indicate that coding is successful, a confirmation message is briefly displayed in the NVivo status bar.
-
When you code at a node, it becomes the 'currently selected node' and is displayed on Quick Coding bar at the bottom of the screen. You can use the Quick Coding bar to code further selections at the 'currently selected node'.

Drag and drop coding
You can drag and drop to code selected content at an existing node:
-
Display your nodes in List View.
-
Open a source or node in Detail View. You may want to arrange the workspace so that Detail View is beside the node list—refer to Customize the workspace (Display Detail View on the right) for more information.
-
Select the content you want to code.
-
Drag the selected content to the node.
NOTE To indicate that coding is successful, a confirmation message is briefly displayed in the NVivo status bar.
Code at a new node
-
Select the content you want to code.
-
On the Analyze tab, in the Coding group, under Code Selection At, click New Node.
The New Node dialog box opens.
-
(Optional) To specify the location for the new node, click the Select button. The Select Location dialog box opens. Select the folder or node that you want to store the new node under and then click OK.
-
Enter a name and description for the new node.
-
Click OK.
NOTE
-
If the node you want to store the new node under has a nickname, you can select it from the Select item from nickname list and click Select.
-
To filter the nodes displayed in the Select Location dialog box, click the Filter button and define the filter criteria— refer to Find project items for more information.
-
To indicate that coding is successful, a confirmation message is briefly displayed in the NVivo status bar.
-
You can also create new nodes when you use the Quick Coding bar.
Using the Quick Coding bar
The Quick Coding bar provides a fast way to code or uncode. It is displayed, by default, at the bottom of a Detail View when you are working with sources and nodes. If you can't see the Quick Coding bar, you can display it—on the View tab, in the Workspace group, click Quick Coding, and then select Docked.

With the Quick Coding bar, you can:
a Select the location for the node (a folder or parent node). Alternatively, you can select Nickname—refer to Using nicknames to speed up coding for more information.
b Enter or select a node. As you type, NVivo will suggest existing nodes in the hierarchy, at (or below) the selected location, that you can choose from. You can also create a new node in the selected location by entering a unique name.
c Code or uncode at the selected node. You can also press ENTER to code at the current node.
d Make a node from selected text (code In Vivo)
e Hide the Quick Coding bar.
TIPS
-
The currently selected node displays on the Quick Coding bar.
-
The Code At list includes nodes and descendant nodes in the current location, as well as nodes you have recently coded at.
-
You can use the keyboard to move to the Quick coding bar—press CTRL+Q to position the insertion point in the Code At box.
-
You can undock the Quick Coding bar so that it floats over the workspace—then you can move it to any location in the NVivo window—refer to Customize the workspace for more information.
Using nicknames to speed up coding
When you create a node (or edit its properties) you can give it a nickname (for example, ag for agriculture or sustn for sustainable). Nodes with nicknames are available for fast selection on the Quick Coding bar—to keep this list manageable, it is a good idea to reserve nicknames for a small number of nodes that you use frequently. Refer to Give a node a nickname for more information.
To code content using a nickname:
-
Select the content you want to code.
-
In the Quick Coding bar, select Nickname from the In list.
-
In the Code At box, enter the nickname. As you type, NVivo suggests existing nicknames that you can choose from.
-
Click the Code at current nodes button on the right.
NOTE To indicate that coding is successful, a confirmation message is briefly displayed in the NVivo status bar.
Code entire sources to a node
You can code entire sources to new or existing nodes. This can be useful, if you want to code everything in the source to a particular theme node, or if the source contains the responses of an individual and you want to code it all at their case node.
When you code entire sources, the number of coding references created vary depending on source type—for documents, the entire content is coded to a single reference, whereas for audio sources, the media and transcript are coded to separate references—refer to About coding (Coding entire sources to a node) for more information.
To code entire at a new node:
-
Select the source (or multiple sources) in List View, or click in the source that is open in Detail View.
-
On the Analyze tab, in the Coding group, under Code Sources At, click New Node.
The New Node dialog box opens.
-
(Optional) To specify the location for the new node, click the Select button. The Select Location dialog box opens. Select the folder or node that you want to store the new node under and then click OK.
-
Enter a name and description for the new node.
-
Click OK.
To code entire at an existing node:
-
Select the source (or multiple sources) in List View, or click in the source that is open in Detail View.
-
On the Analyze tab, in the Coding group, under Code Sources At, click Existing Nodes.
The Select Project Items dialog box opens.
- On the left, click the folder name that contains the node you want to code at.
- On the right, select the check box for the node you want to code at.
- Click OK.
NOTE
-
You can code the selected sources at multiple nodes.
-
If the node you want to code at has a nickname, you can select it from the Select item from nickname list and click Select.
-
To indicate that coding is successful, a confirmation message is briefly displayed in the NVivo status bar.
Make a node from selected text (In Vivo code)
You can create a new node based on selected text—this is called 'In Vivo' coding. The text is used as the node name (up to 256 characters).
To create a node In Vivo:
-
Select the text content you want to code.
-
On the Analyze tab, in the Coding group, click Code In Vivo.
Shortcut Click Code In Vivo on the Quick Coding bar.
A node is created based on the selected text.
NOTE
-
You can edit the node name in the Node Properties—select the node in List View, then on the Home tab, in the Item group, click Properties.
-
If you are working in a PDF source, you must select text (rather than a region containing text), if you want to code by the 'In Vivo' method. Refer to About document and PDF sources for information about selecting content in PDFs.
Turn on or off code whole words
By default, when you code a few letters of a word, NVivo codes the whole word. If you want to select and code individual letters, you can turn off the code whole words option:
-
Click the File tab, and then click Options.
The Application Options dialog box opens.
-
On the General tab under Coding, clear the Code whole words check box.
-
Click OK.