


Filter, sort and customize a classification sheet
When you open a classification sheet, you see a grid listing all the source or nodes assigned to the classification with their attribute values.
You can filter, sort and customize the classification sheet to suit your analysis.
What do you want to do?
- Change the display of source or node names
- Filter by attribute value
- Sort attribute values
- Hide rows or columns
- Show hidden rows or columns
- Show or hide column and row IDs
- Reorder columns
- Transpose the columns and rows
- Apply original display settings
Change the display of source or node names
You can change how project items names are displayed in the classification sheet. For example, instead of displaying the folder location in the source or node names, you could choose to display the name only.
-
Click in the Detail View.
-
On the View tab, in the Detail View group, click Classification.
-
Select the name format you want to display.
 Top of Page
Filter by attribute value
You can filter the project items in the classification sheet based on their attribute values. For example, you could show only the sources with a specific publication date or only case nodes where age group=18-25.
-
Select a column you want to filter.
-
On the Layout tab, in the Sort & Filter group, click Filter, and then click Filter Column.
The Classification Filter Options dialog box opens.
-
Specify the filter you want to apply to the column—refer to Applying filters for more information.
-
Click OK. The filter icon
 at the top of the column displays red to indicate a filter has been applied.
NOTE
-
You can apply filters to multiple columns. For example, you could display only the journal articles where Title contains 'climate' and year=2010.
-
To clear the filter on a selected column—on the Layout tab, in the Sort & Filter group, click Filter, and then click Clear Filter on Column. You can also clear the filter by clicking on the filter icon
, and then clicking the Clear Filter button on the Classification Filter Options dialog box. -
If you transpose the grid so that attributes are displayed in rows, you can apply filters to the rows.
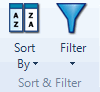
Sort attribute values
-
Select a column that you want to sort on.
-
On the Layout tab, in the Sort & Filter group, click Sort By and then click Column.
The data is sorted by the selected column in ascending order.
NOTE You can repeat the steps above to sort the selected column in descending order.
Hide rows or columns
-
Click the row or column header to select the row or column.
-
On the Layout tab, in the Show/Hide group, click
 Hide Row or
  Hide Column.
The selected row or column is hidden.
Show hidden rows or columns
To show all hidden rows or columns:
-
On the Layout tab, in the Show/Hide group, click
 Show All Rows or
  Show All Columns.
All hidden rows or columns become visible.
To show a single hidden row or column:
-
Do one of the following
-
Select rows above and below the row you want to show.
-
Select columns to the left and right of the column you want to show.
-
On the Layout tab, in the Show/Hide group, click
 Unhide Row or
  Unhide Column.
The hidden row or column becomes visible.
Show or hide column and row IDs
You can hide the identification numbers that preface row and column names.
-
Click in the Detail View.
-
On the Layout tab, in the Show/Hide group, click Row IDs or Column IDs.
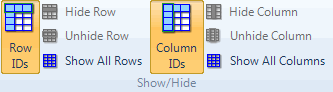
NOTE Hiding row or column IDs can make it difficult to determine if rows or columns have been hidden.
Reorder columns
To reorder the columns in the classification sheet:
-
Select the column you want to move.
-
On the Layout tab in the Rows & Columns group, click
 Move Right or
  Move Left.
Transpose the columns and rows
You can rearrange the columns and rows in the classification sheet.
-
Click in Detail View.
-
On the Layout tab, in the Rows & Columns group, click Transpose.
![]()
The columns and rows are rearranged.
Apply original display settings
To return the classification sheet back to its original display settings:
-
On the Layout tab in the Tools group, click Reset Settings.
