


Adjust picture settings
When you are working with picture sources in NVivo, you can rotate the picture, adjust brightness or contrast, and change the density of shading used to identify areas of the picture that are coded, annotated or linked. You can also compress the picture to reduce its file size.
What do you want to do?
- Rotate the picture
- Reduce the size of a picture source by compressing the picture
- Adjust the brightness and contrast of the picture
- Adjust the region shading used to mark coding, links and annotations
Rotate the picture
When working with a picture source, you can rotate pictures at 90 degree angles clockwise or counter-clockwise.
To rotate the picture:
-
Make sure you are in edit mode.
-
On the Picture tab, in the Adjust group, under Rotate click Right 90% or Left 90%.
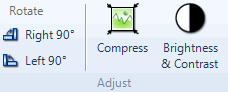

Reduce the size of a picture source by compressing the picture
You can compress a picture in a picture source to reduce its overall size while retaining an acceptable quality.
To compress the picture:
-
Make sure you are in edit mode.
-
On the Picture tab, in the Adjust group, click Compress.
-
Use the Quality slider to adjust the compression. Note that the greater the compression, the lower the quality of the picture.
-
(Optional) Compare the New Size against the Current Size to see the change in file size.
-
(Optional) Check the quality of the preview picture provided for the effects of the change in compression.
-
Once you are satisfied with the change in file size and picture quality, click OK.
NOTE Once you compress a picture and save the project, you cannot revert back to the original settings.
Adjust the brightness and contrast of the picture
To adjust the brightness and contrast levels of the picture in a picture source:
- Make sure you are in edit mode.
- On the Picture tab, in the Adjust group, click Brightness & Contrast.
- Use the Brightness and Contrast sliders to adjust the levels.
- (Optional) Check the effect on the preview provided. You can click Reset to go back to the original settings.
- Once you are satisfied with the adjustments, click OK.
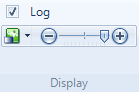
Adjust the region shading used to mark coding, links and annotations
When you code, link or annotate a region of a picture, the selected areas are shaded in yellow, red or blue. This may make it difficult to view the picture underneath the shading. You can adjust the shading density without losing the coding or link information.
On the Picture tab, in the Display group, do one of the following:
-
To adjust the region shading, use the Region Shading slider.
-
To turn off shading, click the arrow beside Region Shading, and then click None.
NOTE
-
The setting applies to ALL the regions shaded in the picture.
-
The setting will only persist for the currently open project. Once the project is closed, the region shading setting reverts back to default—the darkest shading option.